Diet plan: eat like a bird.

Among the upsides of shedding pounds are improving power to weight ratio or making better use of the power you have, it is inexpensive until you really want to go crazy, better braking, and gas mileage. If you are one of those anti-NVH types (noise, vibration, harshness,) then this is not for you. Once all your sound deadening, carpeting, and seats are gone, things get loud. It’s a minor tradeoff for the benefits, in my opinion, but you can still get rid of some extra baggage and keep the noise down if that’s the route you want to go.

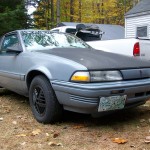
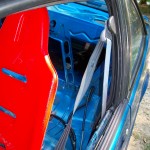
On my way to completely gutting the bird (yes, I drive it daily this way) I have personally weighed pretty much every piece I’ve removed to keep track of the difference using a digital hanging scale, none of these are guesses or borrowed. As of this writing I’ve removed about 334 pounds and added back in about 43. I’m not going to claim they’re all 100% accurate, but here they are anyway.

The ultimate in quiet and comfort.

The ultimate in quiet and comfort.

The ongoing list of weights of Sunbird parts:
ac, all total 32.75
ac accumulator
ac comp bracket 3.00
ac compressor
ac condenser
ac exchange in heater box 3.96
air filter 0.88
airbox 1.86
amp pyle hydra 1.46
amp stock 1.58
armrest & sm ash 3.48
armrest brackets, door 0.98ea = 1.96
battery 33.24
cam sprocket, steel 0.92
cam sprocket, alum 0.38
canister delete plate
carbon canister, cover
carpet 25.08
cat (w/flanges) 11.06
clock 0.80
center console 1.94
center console rear cover 0.44
kick panel covers 0.30
coolant reservoir 1.10
door panel pockets ph1 1.04
door panels ph2 8.96ea = 17.92
eaton m62 26.00
fuel filler guard 0.20
firewall sound dead
glovebox 3.04
grille 0.48
grille bar 0.52
headliner 3.20
hood steel 43.00
hood z24 37.84
intake tube rubber 1.14
intake/silencer upper 0.92
intake/silencer lower 1.32
jack 4.72
jack bracket .3
latch and front support 4.72
latch and headlight front support only 3.70
latch cable and pull 0.22
latch, hood 1.10
latch, hood mounted catch 0.52
license plate and bkt front 0.88
lug wrench 1.54
mirror drv 1.10
mirror psg 0.80
n2o w/ brackets 14.72 empty, 24.72 full
package tray rear 4.06
pillar trim and sound dead (all) 4.23
pioneer cd 2.92
power lock sol, switch, wire drv 0.92
power lock sol, switch, wire psg 0.92
radio housing console 3.04
rear ¼ plastic & sound dead 5.20
seat belt and buckle, passenger 6.40
seat belts, rear 6.70
seat front drv 38.00
seat front psg 34.40
seat rear back 2d 13.76
seat rear bottom 2d 9.96
seat plastic rail covers 0.58
seat poly summit 14.85
seat bracket for summit seat
seat buckle psg 0.66
shift knob 0.40
sound dead right kick 0.74
sill trim 0.62ea = 1.24
spare tire 24.78
shifter ind./cover 0.58
speaker front 0.58ea = 1.16
speaker rear 2.60ea = 5.20
speaker grilles
splash guard 0.84
spoiler & 3rd 7.62
tach sunpro 2 5/8″ 0.44
taillight, trunk mounted 2d 2.08ea = 4.16
tape deck 2.52
timing cover front plastic 0.62
timing cover rear metal 2.12
triple gauge pod summit 1.02
trunk carpet, panel
under dash plastic horiz L 0.58
under dash plastic horiz R 0.80
visor driver 0.98
visor passenger 0.98
wheel stock alum 14″ 15.00
wheel stock alum 14″ w/ 185/75 31.94 36.96
wheel steel 14 17.32
wiper & arm L 0.88
wiper & arm R 0.92

Posted in 1993 Pontiac Sunbird coupe | 2 Comments

GoiNg places.

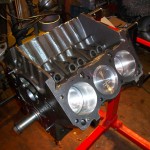
This is the first of the major GN updates since this project is now at the top of the queue, not counting any daily driver problems that might pop up. First, check out the carnage. Then, here’s where things stand so far:

 The heads had to be replaced; the new ones are stock style with a 3 angle valve job and are all assembled and ready to install, which I should be getting around to pretty soon here. The crank, rods, and pistons are all in and torqued down using ARP hardware. The stock crank and rods were ground .010, and a .030 bore cleaned up the scored walls. All machining by the nice guys over at R&L. The pistons were junk and replaced with some forged Speed Pros. I already have gaskets, (206/206) cam, lifters, and timing chain. I started with the rope main seals, but threw them away pretty quick and ordered some neoprene ones, same for the front cover. The timing cover, valve covers, and intakes are all cleaned and blasted and waiting for me to powdercoat. Colors of choice are red and “almost chrome” silver, I just have to decide which parts to make which color.

There’s still a lot I need and need to accomplish, but I’m shooting to get this thing running for the spring or early summer at the latest. A couple upgrades I’m hoping for are a TE34 turbo and some stainless headers since the stockers are cracked, welded and have seen better days. Along with that some bigger injectors, another Turbotweak chip to go with them, probably a wideband, and more…

3.8 in progress.

3.8 in progress.

Posted in 1986 Buick Grand National | 1 Comment

GN carnage.

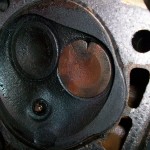
This is a precursor to all the upcoming GN project updates, and what I found upon tearing apart the engine in the summer of 2011. Below gives you an idea of how bad things were, click here to see the whole mess.

The short version is, there were a couple badly burnt valves, both heads were cracked beyond repair, the pistons were eroded around the edges, some had impact marks from debris, and the cylinders were all scored up.

A former valve.

A former valve.

Posted in 1986 Buick Grand National | 2 Comments

Drag Bird.

Below is a modified description of my experience first drag racing the Sunbird at the end of the season in 2011 that I took from a post I put up shortly after.

I pulled in to the dragway and teched in for street night. It passed with no issues, so I got in line, made it to the front, staged, took off, hit 3k rpm and … the nitrous didn’t engage! I ran a blazing fast 17.4 n/a. I’m glad it didn’t because it gave me a good baseline anyway. After some head scratching I realized that I lost the setting for the rpm switch to interpret the tach signal correctly when I last disconnected the battery. So a few button pushes later and I was on my way. Pulled up to the line again, launched (if you can call it that) , wound up to 3k, nitrous engages, and to my surprise the puny 185s lit right up! The result was a 16.2 so I knew there was at least a little potential left. I was pretty happy even with that – my 5.0 LTD ran that when it was close to stock. Anyway, I ran 3 more times keeping the tire spin in check – all 15.5s with the best being 15.52 @ 87.9. Not the fastest thing around by any means, but it’s a lot of fun all the same!

The funniest thing was afterwards a guy came up to me and was looking over the car and said, “My mom used to have a Sunbird, but it sure didn’t go like that! What’d you do to it?”

Drag numbers and rubber chunks.

Drag numbers and rubber chunks.

Posted in 1993 Pontiac Sunbird coupe | 1 Comment

Nitrous install.

Installing nitrous on a 2.0L Sunbird gets some puzzled looks and laughs; this is not most people’s first choice of car to do such things to. It does, however, also get some interest being different. That being said, before getting to the install, I will tell you why. First of all, this kit has been sitting on my bench for probably over 3 years, and with the Mustang currently dead in the water, sometimes I just want to put things to use. Second of all, it’s just plain fun.

Nitrous is a great addition to a daily driver in my opinion for a few reasons. It doesn’t have to be permanent and can be moved to another vehicle later, it doesn’t require any major hardware changes if used in smaller doses, you don’t have to use it constantly so your car gets as good of gas mileage and driveability as it did before, it’s pretty easy to install, and it’s a lot of horsepower for not a lot of money. There are a few caveats to consider too, though. Nitrous seems to have a bad stigma, that you will blow up your engine if you use it. This is true if you don’t follow the rules and inject more than is recommended and don’t use any safeguards like a fuel pressure safety switch, rpm window switch, trans cooler, or optionally even an air fuel cutoff switch. The reality is, if you do all of these things and maintain your car well, you should get plenty of trouble free operation from it. Sure, when you add stress things will wear out a little more quickly, but only you can decide if you want the tradeoff. Nitrous or not, your engine will eventually wear out. The only immediate drawback is running out and having to get the bottle filled.

The false minimum of items you need for installation are a switch, the bottle and brackets, lines, nozzle and jets, and solenoids. Once that went horribly wrong, the real minimum items in my opinion are all of the above items plus a fuel pressure safety switch, wide open throttle switch, rpm window switch, nitrous pressure gauge, fuel pressure gauge, a decent scale, and knowledge about your factory horsepower and fuel pump (and probably injectors too if you decided to go the dry route.) These all make sure you’re not injecting when you shouldn’t be, or too much. The scale is for when you get tired of guessing how much you have left in your tank, because the pressure gauge does not give you any indication of that, only the weight of the bottle does.

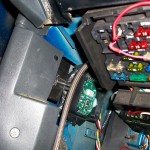
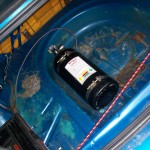
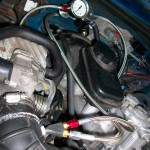
On to a few install details! I picked up the kit used, so I had to get a few things before I could get started. These included a Summit RPM window switch, fuel pressure gauge, a couple AN fittings to attach the gauge and solenoids, an LED indicator for when the system is armed, some wire, and hardware to mount the bottle bracket. It’s pretty straight forward, I ran the nitrous line through the interior and out the firewall, and mounted the solenoids in the engine bay on the firewall, close enough so the short lines could reach from them to the nozzle. The wiring was the only involved part that required a little planning since there is some wiring to hook up to operate the window switch, and then the inline relay, wide open throttle switch, arming switch, and fuel pressure safety switches. A bottle fill, setting the fuel pressure and rpm limits, and it was spraying in no time! I later added a blow down tube to make the setup dragway legal.

Up-high arming switch.

Up-high arming switch.

RPM window switch.

RPM window switch.

Bottle in the trunk.

Bottle in the trunk.

Nozzle, lines, solenoids, fuel pressure switch and gauge...

Nozzle, lines, solenoids, fuel pressure switch and gauge...

Posted in 1993 Pontiac Sunbird coupe | 2 Comments

Banishing the blue.

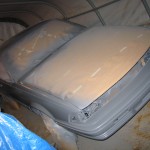
Ever since I bought the bird, I never really cared for the blue.  Well, to be honest it grew on me a little, but I still wanted something else. It took a couple years, but I finally sprayed it Summit epoxy gray primer.  It was my first paint attempt and the primer went on pretty nice.

I then decided to add some clearcoat over it and chose the pre mix off the shelf Duplicolor stuff. That did not turn out so well at all. I don’t believe I did anything wrong, but it was very hard to coat it evenly, it was relatively expensive, and afterward it started to discolor (turn white) in places. Now, this is no show car so it’s no big deal to me – it was an experiment, but if it weren’t I would be pretty irritated.

All in all, I learned a lot of things such as use lots of light so you don’t miss spots (oops) and use a decent clearcoat.

Bird masked.

Posted in 1993 Pontiac Sunbird coupe | 1 Comment

Bird droppings.

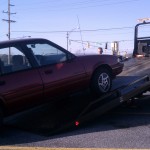
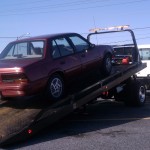
What else can you expect on the day of purchasing another Sunbird but that it would break down?  A bad crank position sensor wire was the culprit.

A couple pictures of the maroon four door’s first days – May 2011.

Heading up the ramp!

Ready for transport.

Posted in 1993 Pontiac Sunbird sedan | 1 Comment

Mess.

For all my zero readers, fiveocd is undergoing some changes. I’m going to do a more blog style setup where new posts are on the main page and you can sort the updates by category from the right menus.

Posted in Uncategorized | 2 Comments

Lightweight, unobtrusive audio.

It’s not too much to ask!  Although my Sunbird is very stripped down, there are a few things that I wanted to maintain for now given its daily driven status and some semblance of an audio system was one of them. I don’t need fancy speakers or any of that stuff, I pretty much just want it to function and be light and out of the way for a clean/nonexistent look.

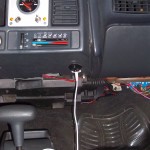
My solution to that problem is a hand-me-down ipod and a Pyle PLMRMP3A marine mini amp. I chose it because it’s pretty small, light, cheap, and included a remote aux. input and volume knob which made it perfect for a standalone system with no head unit. The amp is mounted to the housing that used to carry the original amp up inside the dash. With no ipod connected, you can’t really even tell there is any stereo at all unless you look underneath the console where I mounted the knob and input. It only weighs a couple ounces less than the stock amp, but I don’t have a head unit to deal with and the ipod is removed when not in use. It may be a little bit of an unorthodox setup, but I like it a lot.

Not much to see here!

Posted in 1993 Pontiac Sunbird coupe | Leave a comment

Autozone coil pack: Fail.

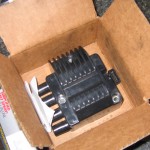
One week after finishing the head gasket, the car started running like crap again. It took me a while to figure it out, because I didn’t believe that a new coil pack would die in a single week … well, it did. Cylinder 3 stopped firing. Made in Taiwan.

steaming pile

steaming pile

Posted in 1993 Pontiac Sunbird coupe | 2 Comments