J Body ABS Delete

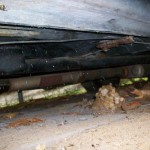
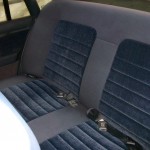
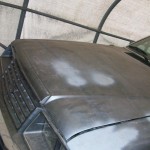
Below is the information I’ve compiled on deleting the ABS system and converting to non-ABS brakes on a second generation J body, in my case the 93 Sunbird two door. It never worked, added weight, complication, and I just didn’t see the need for keeping it around. It cleans up the engine bay a little too.

Depending on what you think is easier, you can either take apart the ABS master cylinder and reuse it, or you can swap in a pre 92 one and use it. If you use the ABS one, you’ll have to drill and tap the lower two ports, but you can then reuse all but one of your original lines with a little bending. When drilling for tapping, don’t drill into the sealing surfaces/taper of the master cylinder or you may create sealing problems. If you use the non-ABS one, you’ll have to cut 3 of 4 lines, bubble flare them, get some new fittings, and then bend them into position.

The info below should get you started, but it can be done many different ways. You could probably find adapters to prevent doing any cutting and flaring, some people like to convert to AN lines, and so on.

I went the non-ABS master cylinder route just because I wasn’t sure what would be involved until I pulled the ABS stuff apart later on to check it out, and I already had all of the extra fittings required.

Master Cylinder Info

All fittings are metric iso bubble flares, and all lines are 3/16″.

brake locations refer to L(eft) as driver side, R(ight) as passenger, F(ront), and R(ear) brakes
mcyl locations refer to F(ront of car), R(ear of car), U(pper port), and L(ower port)

ABS mcyl sizes from left(front of car) to right(rear of car) factory:
brake location – fitting size

LF – M10 x 1.0
RR – M11 x 1.5
LR – M10 x 1.0
RF – M11 x 1.5

ABS mcyl port sizes with abs equipment removed:
brake location – fitting size – location on mcyl
LF – M10 x 1.0 – UF
RF – M10 x 1.0 – UR
RR – .314 dia. untapped – LF   (tap to M11 x 1.5, drill size 9.5 mm [.374 in] to reuse stock line)
LR – .314 dia. untapped – LR   (tap to M10 x 1.0, drill size 9 mm [.354 in] to reuse stock line)

Non-ABS mcyl sizes:
brake location – fitting size – location on mcyl
RR – M10 x 1.0 – LF
RF – M11 x 1.5 – UR
LF – M12 x 1.0 – UF
LR – M13 x 1.5 – LR

Brake line fittings for conversion:
brake line – if using ABS mcyl – if using non-ABS mcyl
LF – as is – to M12
RR – as is if abs mcyl tapped to M11 – to M10
LR – as is if abs mcyl tapped to M10 – to M13
RF – to M10 – as is

Posted in 1993 Pontiac Sunbird coupe, Tech | Leave a comment

J Body Control Arm Refresh.

Since I’ve done this a few times now, I thought I’d share my experiences with freshening up the Sunbird’s control arms this time around.

Ball joint removal:
If they’ve never been replaced, you unfortunately are going to have to get the factory ball joint rivets out first. You can either attempt to drill them out, or grind the heads and press or pound them out. Each method has its difficulties.

For drilling, one side of the rivets has a center indentation to start the drill. At this age, they may no longer provide a good center to drill anymore due to rust etc. The other tricky part will be setting the control arm up to get a straight hole, since they are not exactly flat on the opposite side. One more thing about this method is, I wouldn’t advise using a .500(1/2)” drill as others do – the hole is actually closer to .453(29/64)” and you want to minimize material loss which may weaken the mounting points. If your hole is not dead center, you’ll want to go smaller still. Only drill out enough just to get it out, and make sure your hole is as centered and as straight as possible and you will be ok. The bolts that replace the rivets are 12mm in the kit I got, so you may have to drill out the hole a bit to fit them, but that is better than blowing the hole out too large and probably also changing its location when trying to get out the rivets.

To be able to press out the rivets, you’re going to have to use a cutoff or grinding wheel to get the head off at least one side of the rivets. The heads on the lower side are shallower than the top side, so to make it a little easier, grind them off. You may want to try to grind the head a little below the surface of the arm if you can, while trying to avoid grinding the arm. Any lip remaining will make it hard to press out, especially if you are going to try to hammer it out. With a hydraulic press, it is not quite as big a deal, it will just fold the small amount of lip over as it goes.  Pressing them out can mushroom the mounting holes in the control arm a bit on the far side. I would suggest you put in some ball joints (new, old, or .281(9/32)” thick material) and vice, C clamp, or hammer them carefully back to flat before putting things back together.

Bushing removal:
You can burn bushings out with a torch, but I don’t find it necessary due to their design in this case. They are somewhat hourglass shaped, so they don’t contact the entire inside of the arm, making them a little easier to get out because they fuse to the arm in fewer places. If you do want to torch them though, I’d keep the heat toward the center of the bushing or the steel bolt tube; these aren’t the most rugged of control arms, and you could probably distort or melt the stamped metal pretty easily. Another word of caution when doing this, and I have a feeling this is pretty rare, but somehow I had one of them build up pressure once and shoot the center tube right out of the bushing. (It wasn’t a J control arm.)

I found on my factory 128k mile control arms that all that had to be done for 3 out of 4 was hacksaw one side of the rubber bushing flange around the outside edge to weaken it enough so it would fold up when I pounded them out the other side of the housing. You also can hack the whole “rubber flange” part off if you like. On the fourth, I had to resort to drilling some holes in the rubber to weaken it and loosen the rubber’s hold.  Just be careful of chewing up the inside of the control arm housing when doing this, the drill wants to walk. Also, when this happens, it may leave some rubber behind in the bore which you will have to find a way to scrape out before installing the new bushings.

Installation:
Installing the new bushings and ball joints is pretty straight forward. The ball joints simply bolt in with three new bolts (usually supplied with the ball joints,) and the bushings you should be able to push or tap in easily after you’ve greased them, assuming you’re upgrading to polyurethane while you’re in there – which you should, and you won’t have to do this again for a long time, and will also improve handling while you’re at it.

The only other thing of note when going to install the control arm and spindle, is just as you may have already found if you’ve taken them out, it may be easier to install them as a unit. Once the driveshaft enters the picture, there is no room to install the castellated nut on the ball joint, or any way to torque it either.

Posted in 1993 Pontiac Sunbird coupe, 1993 Pontiac Sunbird sedan, Tech | Leave a comment

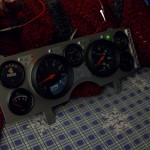
Dash it … again.

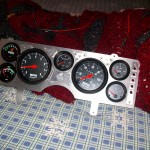
I revised my original GN dash design because I wasn’t happy with how the indicators I had looked. The revised version adds some depth to the dash and in my opinion really makes it stand out and look a lot better. Below is a preview with a lit up turn signal and a straight on shot.

GN dash v2 in progress

GN dash v2 in progress

GN dash v2

GN dash v2

Posted in 1986 Buick Grand National | 3 Comments

306.

When parking the Mustang for the winter at the end of 2010, the bottom end was making some terrible noises. So there it sat until I could scrape together the funds and time to rebuild. Already in the stable was a .030 over block and cheap Summit rebuild kit with hyper pistons, gaskets, etc. I decided to take a break in the gradual GN build and slap together a functional 5.0 and quickly get the thing back on the road. The rotating assembly went out for balancing and was done in no time. My rods had to be resized, which I wasn’t planning on, so the cost was a bit more than I expected, but so be it, the ball was now rolling. The bottom end went together pretty fast and smooth with no real major problems. Upon measuring the piston to deck height, and seeing that the new pistons had 8cc reliefs, I realized that factory .047 headgaskets were going to net me a rather low 8.9:1 compression. My plans are most likely some nitrous in the future, not forced induction, so that was a little low for my taste. Some more careful part selection back when I bought everything would have avoided all this, but I just wanted it to function at this point, not start back from square one with different pistons. Instead I found some Mr Gasket .038 head gaskets which would send it up to 9.1:1 – a little more respectable and higher than the stock 9:1 instead of lower. Good enough.

The old engine came out without much trouble, and my mission was to reuse everything I could and keep money and time spent to a minimum. That doesn’t usually go quite as planned, and this was no exception. I hear the P heads come with some pretty mediocre valve springs, and although I never had any issues, I didn’t really want to chance it now that I was putting in a higher lift Trick Flow cam (this is about the one thing that I splurged on that wasn’t totally necessary.) As luck would have it, I already had a Trick Flow spring kit that was installed on my original E7 heads and had seen very little use. Once the heads were off, a quick inspection showed that some of the valves had a decent amount of carbon buildup and I couldn’t just let that slide. So minus one on the time spent category as I removed and cleaned each valve while swapping valve springs from one head to another (which is kind of a pain with my cheap valvespring compressor) and installing new seals along the way. The guides seemed to be in decent shape, so that helped in the cost department. After that, it was just installing most of the old parts onto the block which didn’t present any real challenges. I had a partial ARP bolt kit, but had to get a few extra items from the hardware store to finish it off.

Here’s where it got interesting. I was looking pretty good on schedule to finish by the first week of September, when I finally hit the snags I’ve come to expect. I decided to upgrade to some Prothane motor mounts (originals were old and shot) and so had to remove the old ones of course. Passenger side, no problem – except for having to dig out the never-used 21mm socket for the oddball 14mm metric nut anyway. Driver side, frozen. Grab the breaker bar, start turning and then the dripping starts. I broke the nut free, but also broke the power steering line in the process. Naturally, none of the 3 auto parts stores (that were open) could get me the line for days, so another setback of time. Ok, I decided, let’s deal with that later and at least get the engine in. With some help, in it goes. When mating it to the trans, however, things were not falling into place. After some thought, I realized that I had forgotten this engine originally was equipped with a manual transmission. So, I’m sure you know where I’m going with this, but the pilot bearing was still in the crank preventing the torque converter from seating in as it should – I had not even thought to check before dropping in the motor. Back out it comes. Then the search for a pilot bearing puller began, which I was not able to get until the next day. So overnight it was dropped into the bay to sit until it could be again hoisted and the bearing could be removed and then dropped back in once again finally.

That is the update until the rest of the little things can be buttoned up, so maybe another week or two at most (busy schedule) and it will be back on the road. Enough to get a little use out of it during the fall, I hope, and then ready for some serious use next summer!

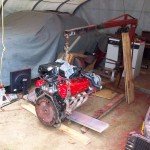
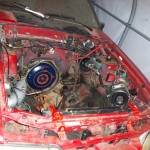
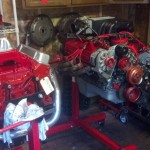
Update: some mid-swap photos.

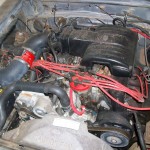
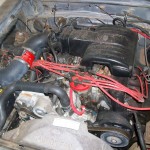
old engine before teardown

old engine before teardown

enginelesstang

enginelesstang

Posted in 1989 Ford Mustang convertible | 3 Comments

5.0 EGR delete plate dimensions.

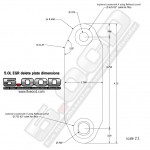
When I decided to make an EGR delete plate for the Mustang’s 306 build (more on that to follow,) I didn’t have my EGR valve handy, so I did some searching online for dimensions, figuring it had been done a hundred times before and probably documented somewhere with some useful numbers. Not so much. So here they are for anyone else who would rather make than purchase a block off plate.

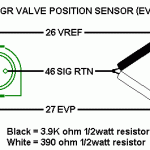
A few notes: The original has an elongated hole on the bottom, not sure why, but it’s easier to just put a regular hole in. The only really important thing is the spacing between the two holes and their size, it doesn’t matter too much if you just get the outside shape to a rough approximation depending on what tools you may have available. I used a piece of 1/4″ thick aluminum, but you can use whatever you want as long as it is rigid and flat enough to seal. I added in rough countersink sizes if you want a nice clean look using flathead screws, but it’s quick and easy to use the existing studs and nuts and skip that step (this is what I have done temporarily until I get around to getting some flatheads.) Also, when deleting the EGR, you can either buy or build a simulator (diagram is below and can be found with some searching, however I have not yet tested it) to prevent ECU codes.

5.0 EGR delete plate

EGR simulator

EGR simulator

Posted in 1989 Ford Mustang convertible, Tech | Leave a comment

Buick vs. Ford

Just a look at what’s brewing in the 5.OCD shop.

buick vs ford

buick vs ford

Posted in 1986 Buick Grand National, 1989 Ford Mustang convertible | Leave a comment

LTD LX for sale

Posted in 1985 Ford LTD LX | Leave a comment

Convertible Top Etiquette.

1. All or Nothing. The first rule is probably the most important. If your top is down, your windows should be too. That means ALL of them. Nothing looks sillier than driving around with your top down and your windows up, and it effectively defeats the purpose anyway. Worse yet is “fins” or your top and front windows down, but the two quarter windows still up: ridiculous.  Windows down and top up is permissible. If you only follow one rule, it should be this one.

2. The Weather. If it’s nice out, put your top down!  A surprising amount of convertible owners do not. If it’s sunny and warm out, and you’re holed up inside with the air conditioning on (pansy) then you should just sell the thing already; the purpose of that vinyl over your head is lost on you. Bonus points go to the hardcore who have the top down long before the temps are reasonable.  I once saw a Mustang with the top down in 20 degrees around Christmas.  Sweet.

3. The Boot. Not all cars have a convertible top cover or “boot.”  If it does though, you should use it. It just looks better. This is not as hard and fast as the previous rules. You can get away with quick runs without the boot, when the top will be going back up soon, or when fearing rain for quick top-up action.  There is also some allowance for personal preference on this one.

4. Nice Paint, Ratty Top.  It’s one thing if the whole car’s a mess, but there are some out there that think the rag top should look like one. It takes a little extra care, but there’s no reason to have a nice looking car with a torn brown top that used to be white.

Posted in Uncategorized | 6 Comments

Snow tires. Get them.

In honor of today’s snowfall, I would like to once again sing the praises of snow tires. Anyone who knows me has probably heard this all before. If you live in a climate where you get some snow, and you have never tried them, you NEED to. All season tires are a misnomer, plain and simple. Even those who drive newer cars (shame on you) with traction control should have them. Traction control can aid in not spinning or slipping (what were you doing, anyway?) but, if you have skis up front they’re not going to help you much when you hit the brakes. The bottom line is, they could save you in a bad situation, and if you have never used snow tires, I almost guarantee you will be surprised at the difference they make.

5.0cd’s own former-project Fairmont was what turned me on to them initially. Snow tires took it from being virtually undriveable in the winter; it could not accelerate without spinning or stop without sliding, to being a very confident winter vehicle. I was sold. Adding them to the Sunbirds makes them excellent winter drivers, and they were already good to begin with.

For a little more technical review with stopping distance comparisons etc. check out the bottom section of this Tire Rack article.

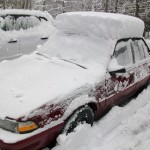
Snow.

Snow.

Posted in Uncategorized | 1 Comment

Still plugGiNg away…

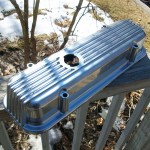
Just a little GN engine project update. The heads are now on, and block, heads, and pan are painted. The upper intake and valve covers are coated in Eastwood’s “almost chrome;” pretty sweet if you ask me. The cam should be in soon, and working now on cleaning up the lower intake (this is going to be a real pain to powder) and getting the timing cover masked and ready for powder.

Painted with some parts sitting on top for effect.

Painted with some parts sitting on top for effect.

Almost chrome powdercoated Buick valve cover.

Almost chrome powdercoated Buick valve cover.

Posted in 1986 Buick Grand National | 4 Comments