Commuting Complications.

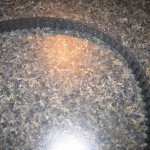
Two days before getting a new job which is twice as far of a drive as before and of course my bird breaks down. In its defense, though, this is the first time it has ever stranded me, so that’s pretty good really. And being so close to home it hardly felt like being stranded. I could have walked home. On the half hour drive, I made it to 1.5 miles from home before it ground to a halt when getting off the highway. I did a very quick look around and didn’t see anything wrong; it would turn over, the battery wasn’t dead, and so on. So I triple A’d it home. I figured initially it might either be another crank position sensor or  the coil pack/ignition module. After testing those, I took a better look around and noticed a tooth was missing off the timing belt. A closer look revealed that the rest of the teeth were not far behind and it had sheared them all around the crank sprocket. That’s all well and good, but I wasn’t sure why … I didn’t think the belt was that old. It appears that the tensioner had frozen, making the belt loose, and it just vibrated itself to death. I threw on a used tensioner and belt from the spare parts reserves and was all good to go.

On a side note, I think things like this are swaying me to remaining 8 valve. I’ve kicked around the 16v swap idea before, but had this happened to a 16v head, valves would probably have met pistons in an unfriendly encounter, and I would now have a big project ahead of me and a down and out daily driver as opposed to a fifteen minute project and then making an hour commute the next day…

Fast forward a few days to today and I’m leaving work. I’ve been making the hour drive no problem all week except for the nasty snowstorm that slowed things to a crawl and reduced visibility to nothing (note to self, please get new wipers asap.) Now there’s a horrendous vibrating rattling banging sound as I’m driving. My mind jumps to the worst case scenarios first, naturally. Broken axle, total transmission failure, and so on. I had to pull over to check out what was going on. I took a look underneath and pushed on the exhaust a little. The whole thing twisted and moved and the resonator (where cat was) was hitting the heat shield and making the racket. Looking back to the muffler area revealed the problem: the bolts to the exhaust hanger had sheared, likely due to bad roads. The entire exhaust was hanging by just the two studs in the exhaust manifold up front! It seemed to stay up and not drag, so I figured I’d go for it and see how it fared for 50+ miles. It made some noise but made it home no problem. Once home, I welded the bracket in place instead of messing with bolts. So we’ll see how it fares with the pot holes tomorrow!

Well those are all of my bird-punishing commuting adventures for now. I’m hoping for not too much drama for a while. At least through the rest of the winter would be nice, but that’s probably asking a lot.

bad belt

bad belt

Posted in 1993 Pontiac Sunbird coupe | 3 Comments

Megasquirted … Sunbird?

Why?
Who in their right mind would do such a thing? The same kind of nutcase that would add nitrous to one I guess! Seriously though, I think the 2.0 is really a reliable engine and although they are not very popular around here, they have a decent following in various forms in Europe and other parts of the world, particularly the 16 valve variants which share the same block as the 8 valve version. Although the 8v setup may not support big power numbers, enough extra can be extracted from it to make it a fun and fair performer in my opinion. Pairing a bottom end built to handle it and a fair shot of the juice, it should provide all the extra power I want in short bursts like the occasional dragway flogging. This is where the Megasquirting comes in: the factory computer for this car just doesn’t have any support in contrast to some of the more popular GM ECUs when it comes to modifications and tuning. So I decided MS was the way to go (plus I had already built this one.)  I’ll be able to compensate for the aftermarket cam, hopefully a ported head at some point, some better flowing exhaust, and I have kicked around the ITB idea also, but not sure about that one yet … the factory intake and bored throttle body will be the first phase intake-wise.

The Project So Far:
It has now run multiple times on Megasquirt, but is not full time yet. I have been waiting to do any real tuning until I could change my wideband situation, which now I have. Since this a little bit of an odd setup, it took me some time and help from experts over at the msextra forums to get everything sorted out such as mods to the MS board, settings, and so on. Once everything is all completely done and all of my notes are sorted out I intend to share in detail everything that has to be done to get the 2.0L port fuel injected Pontiac motor running (in this future post: Megasquirted: Sunbird.)  First I’ll probably see if I can get a decent tune going on the stock engine.  When I get a handle on that I’ll begin running the Megasquirt daily, and then I’ll be comfortable with doing some of the engine mods and updating the tune to suit them.

Above is the basic summary, so stop here if you don’t want to get into some specifics of what’s been done to get to this point.
First is the version 3.0 board with a Megasquirt 1 processor. Not fancy, considering MS3 is now out, but plenty functional. Other than the regular stuff, I had to add 3 things to the proto area; two circuits to control the coil pack/ignition module, and one to send a signal for a tachometer. The ignition seems to work fine so far, but no luck on the tach yet, it may need some tweaking. To get MS hooked up to the engine I found a factory computer to pirate the connector from and built an adapter to go straight from MS to the factory wiring. Desoldering all the pins from the computer is a bit of a pain, but the convenience of being able to switch back and forth from stock computer to MS during testing made it worth the effort. The MS end of the harness was a DIYAutotune harness that I cut. Also had to run a vacuum line into the car to hook to the MS MAP sensor. It’s just a temporary setup right now. Now I need to set up the JAW for a wideband output instead of narrowband simulation, then I may be able to do some more tuning. I just got it running on the narrow sim, but didn’t want to drive that way. For tuning I’m using a 1.4Ghz Celeron laptop running Linux Mint9 LXDE and TunerStudio MS Lite. I started out with MegaTunix, but was having some problems so I switched, and I think I like the TunerStudio better. For what it’s worth, the laptop originally had 256mb of RAM and handled it ok as long as you weren’t doing anything else, but I put in 2GB later on because it was cheap and easy and it sped things up tremendously. Anyway, my post about the finished result will go into much more detail about everything, this is just a generic update for now.

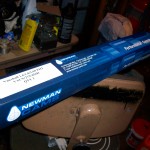
newman cam

2.0L cam from England!

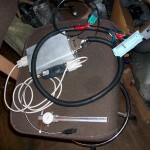
Sunbird Megasquirt

Megasquirt1 pcb3.0 with tuning cable and the Sunbird adapter harness.

Posted in 1993 Pontiac Sunbird coupe | Leave a comment

Bird bung.

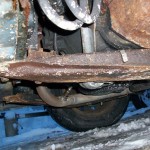
Today’s project of the day was welding an O2 bung into the exhaust of the 2 door bird. I had been running narrowband simulation from my JAW wideband controller, but since the factory sensor mounts into the exhaust manifold which is very short, the sensor was really too close to the head. Supposedly this will shorten the life of the wideband sensor and I’m sure it affects the readings too. I read in the instruction sheets for the AEM widebands (which I am running in the Mustang) that it should be at least 18 inches from the exhaust port. So I added in a new bung further downstream. I replaced the factory narrowband in the manifold location and hooked it back up to the computer and will now see what the wideband reads – it always read pretty rich with the narrow-sim setup.  See picture of: 1. below freezing working conditions, 2. my rust bucket daily driver bird, and 3. new bung welded into the way too small restrictive factory exhaust pipe.

bunged

bunged

Posted in 1993 Pontiac Sunbird coupe | 2 Comments

LTD LX Sendoff.

The LTD LX has now moved from the 5.0CD project garage on to the ex-projects section. It will be missed, but its constant ranking at the bottom of my project priority list and the fact that I really only drove it one summer over the course of 8 years finally sank in and led to it being sold. Good luck to the new owner and his plans for it! I may give an occasional update if I hear of its progress.

farewell LTD LX

farewell LTD LX

Posted in 1985 Ford LTD LX | 2 Comments

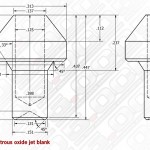
Nitrous jets DIY

I drew this up from some existing jets I have and put together a drill chart of standard sizes to give an idea of what diameter to make the jet holes. It could be handy if you want something other than the standard sizes, want to do some tuning of a system, or have access to the tools and don’t feel like spending money on jets. I think there are different types of jets used in various kits, so you should double check these will work, but I believe they are the most common type. I marked and bolted in some blanks I had made and then some commercial aftermarket jets to see if they seated the same, and they did; but that’s as far as I’ve gotten testing so far. Click on the icon to the right to download the drill diameter to fuel and nitrous jet size chart, but remember it’s only a guideline. There are various formulas out there, and every application is different. Also the fuel column is currently for a 45psi EFI system, I didn’t include carbed yet. I may update that at some point.

nitrous jet blank print

nitrous jet blank print

Posted in Tech | Leave a comment

Bored Bird Body.

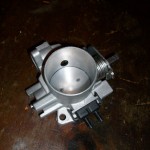
Yet another post related to a project for my other, more unorthodox engine obsession: the 2.0L OHC. I’ve had a spare intake and throttle body laying around that I was given by a friend who no longer wanted them, so I decided to see what could be done with a factory Sunbird throttle body to open it up for more airflow.

A little interjection before I get into the project details; I’m not sure I put much stock in this, but all the same, here’s a fun throttle body calculator to play with.

I had read before about some of the C20GET (turbo 2.0) guys modifying a 54mm Fiero throttle body to fit, which involved some bellcrank grafting among other things to get it to work. I think it is far from a plug and play deal. I had also heard rumor that a Grand National throttle body would bolt right up, but since I happen to have one on hand, a quick study proved that it was not even close. Granted, I am sure you could make an adapter or drill and hack your intake to make just about whatever throttle body fit on there you want – they mostly all work the same. Anyhow, I figured it doesn’t get much more bolt-on-ready than a factory one, so I threw it on the CNC and started cutting. Well, after I disassembled it of course, which was rather different than others I had done before – you have to grind off one end of the shaft to get it all apart and then there is an odd shaft locking ring that is under a peened-in washer. Anyway…

The stock bore varies from 53.2mm at the inlet, tapering down to 50mm around the blade, then stepping to 52.5mm at the outlet, with the smallest area effectively making it a 50mm bore. As the link I posted above illustrates, there are a lot of different formulas to calculate theoretical ideal bore sizes. Not having any dyno time with this in particular, I’m not really sure what may work and what won’t, so this is just a future experiment and exercise of “Because I Can.” I initially was going to resize it to 54mm, but then my Ford mentality kicked in and I decided to go from 50mm to 55mm (most Mustang throttle body upgrades tend to go in 5mm increments.) So first I milled out the housing to 55mm. Then I halved the throttle shaft and filed it wider to fit the new blade. Then I designed a simple fixture to make the blade since it is angled around the outside to sit properly in the bore. I had my friend make the fixture for me, then set up the blade and cut it out of .080 aluminum. It needed some minor filing and sanding work to fit nicely and operate smoothly. Finally, I ground down some flathead bolts (top and bottom) so they would sit flush and provide no obstruction. The originals are M3.5x.6, but I tapped the shaft to 6-40 because they were readily available and the threads are very close (the tap did very little.)

A couple things I ran into while milling the housing are:
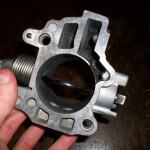
1. A thin wall with two small holes above the vacuum fitting (black part on bottom of first picture) is removed, leaving two large holes. I don’t think this should be a problem since the fitting seals into the housing.
2. Another thin wall which creates a passage for the idle air stepper (that can be seen in the picture on the right) is made much thinner as it was milled. It ended up being about .030 thick, and I think I would call 55mm the max you could get out of the stock housing due to this wall; I wouldn’t want to make it any thinner than that.

That’s about it! Someday I may do an update if I get around to trying it out, but realistically it will probably be better suited to a higher-revving and better-flowing combination than a stock motor for which the 50mm is probably adequate. It was mostly for fun, partially because of my future notions for the car, but also just to try out.

The pictures below show it put back together enough to show the function, but it will probably be coming back apart for powdercoating eventually.

55mm 2.0L throttle body

55mm 2.0L throttle body

55mm half shafted

55mm half shafted

Posted in 1993 Pontiac Sunbird coupe | Leave a comment

Sunbird 2.0L OHC camshaft tool v2

Background:

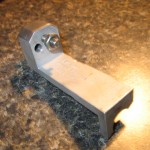
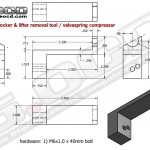
I decided to design this 2.0L valvetrain and cam tool as a lightweight, easy-to-build but slower-to-function alternative to my first version (link below) or for when you just want to swap rockers or lifters and aren’t worried about compressing everything at once.

For reference, an earlier post here shows some details of my first 2.0L camshaft removal tool. It’s rather elaborate, but is quick if you’re just looking to swap the cam.

Instructions and function:

Start by rotating the engine so that the lobe of the cam at the rocker you want to remove is facing straight up and the valve is fully seated. The tool works by setting it on top of the valvespring you want to compress, then bolting it into the corresponding cam housing bolt hole (after the cover is removed) and turning the bolt until the spring is compressed enough so that you can remove the rocker/follower (magnet from the back works well.) Once the rocker is out of the way, you can also remove the lifter. To remove the cam, repeat until you’ve removed all rockers.

There are a few things to note about using the tool.
* First off, just compress enough to get the rocker out and be careful of cranking down too hard into the cam cover. It’s not a very large bolt, and you wouldn’t want to end up stripping out a cover hole.
* The hole through the tool and bolt help keep it straight along with the round shape at the valve end, which seats on the rocker tip guide inserts. These have to be in place or the tool will probably want to bend and break something or slip off the valve.
* There are two holes in the cover at either end which are spaced differently from the valve than the rest. These are where you need to switch the bolt from the central hole of the tool, to the offset one.
* On these offset valves, I had some clearance problems where I had to rotate the rocker off the valve and remove the lifter before the rocker would come out completely.
* There is an eccentric toward the front of the cam that seemingly serves no purpose but to get in the way. When this happens, you may find that you have to point the lobes a little differently than straight up to avoid the eccentric from hitting the removal tool. As long as the valve isn’t open, it will work fine.
* Another thing to be aware of is that the tool may slip without the lash caps on the valves, so use them when reinstalling the rockers.

Applications:

2.0L OHC : all versions including TBI, PFI, turbo (LT3, C20GET)
– found in Pontiac 82-94 Sunbird, 88-91 LeMans, 87-89 Grand Am SE, 87-88 Olds Firenza, 87-89 Buick Skyhawk
1.8L OHC : probably, since it is very similar to the 2.0
– found in same as above
20NE, 20SE, 20SEH, C20NE, C20GET : European same basic engine as 2.0
– found in various Vauxhalls and Opels
18NE etc : probably, Euro equivalent to 1.8L above, not sure what all their engine codes are
– found in various Vauxhalls and Opels
Others? – If you know more engines that share this layout like maybe the sub-1.8L European engines, let me know.

Construction:

Anyone with basic machining skills should be able to build this tool from the print below, and if not, any machine shop should be able to for you easily. You may be able to get away with using a drill press if you have a decent setup. I used some scrap 6061 aluminum, which works just fine, but you can also use steel or whatever else is available. Also, this is a guide for one way to do it. There is extra material on the top of the part behind the two holes that could be removed if you want. As you’ll be able to see when I put up a picture of mine, I cut down that side some and chamfered the edges. The important parts are the height used for compressing the spring, that there’s enough material in the holes to guide the bolt somewhat and keep it straight, and the relationship of the holes to the compressing shape. Anyway, if you stick to the print it will work fine. Another thing you can do alternately to using the bolt is an M6 stud or threaded rod, and then use a nut to compress the spring instead of turning the bolt. This may be a little easier on the holes.
Disclaimer: Build and use at your own risk, and enjoy.

cam tool 2

cam tool 2

2.0L valvetrain tool.

2.0L valvetrain tool.

Posted in 1993 Pontiac Sunbird coupe, 1993 Pontiac Sunbird sedan, Tech | 2 Comments

Sunbird update: BPTS

All the brake and suspension work on the bird has been finished up and it’s been back on the road for a few weeks now. The only other thing of interest that happened when wrapping it up was having to set the camber using trigonometry and gauge pins because for some stupid reason the alignment shop wouldn’t do it. Their numbers were helpful, but that was about it.

The handling is much improved from the poly bushings and endlinks and all the other new hardware. It is not rock solid; but that’s to be expected from run of the mill street friendly struts. It has been restored to its potential, which in my opinion is still a very capable handler and is much more enjoyable to drive.

The brakes, on the other hand, I am pretty impressed with. The lack of ABS clutter is nice, and the stainless flex lines have given it a firmer pedal feel. Where it really shines is the Hawk HPS pads and the new rotors. I’ve never tried any kind of performance pads before, but they have really made a drastic difference. This may be a modification that will be added to the snow tire category of items you didn’t know you couldn’t live without until you tried them. When you hit the brakes, it’s a nice feeling to know the things are going to grab like mad and stop you quick.

A quick comparison.

I compared the braking of the 93 four door to the 93 two door to get an idea for the difference and improvement. A couple things to note first; the four door has a full interior and is heavier where the two door has next to no interior and is pretty light, and I don’t know exactly what brakes are in the four door, but considering that the dealer it came from sold it with junk tires and a bad crank sensor, it’s unlikely there is anything fancy whatsoever with its setup. I couldn’t really do a direct before and after with the two door because the brakes were old and spongy to begin with, whereas the four door’s brakes have always felt really nice.

The tables have turned a little now, giving the edge to the two door. Surprisingly, the four door’s pedal feel is pretty solid despite its rubber flex lines – I’m not really even sure if I could tell in a blind test which car had the stainless flex lines or not, which is an interesting thing to note for the budget conscious. I still like the fact that they’re not going to rot off, regardless of their firmness. The pads are where you can tell the real difference. It’s not just the weight difference, which would be evident if you were doing something like 60 to 0 tests, it’s more of the feel – the pads grab and bite harder than the regular ones. I know this is nothing quantifiable, but still is worth mentioning and trying yourself if you’re after some more stopping power – and why wouldn’t you be? It could be the difference between hitting something and not.

One thing that remains to be seen is how long they’ll last. I think I still will find them worthwhile if they hold up half as long as regular pads just because of the gains you get. My last generic-parts-store-special pads lasted me 40k miles or so. In the end, the upgraded pads are well worth the extra few dollars spent if you ask me, and I likely will be doing the same thing to the four door when the time comes.

Bring it on.

Bring it on.

Posted in 1993 Pontiac Sunbird coupe | Leave a comment

Bird BS.

That’s for Brakes and Suspension. Ok, and maybe something else too for all the other troubles.

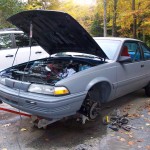
The two door Sunbird has been off the road for a few weeks now since I decided to tackle everything brake and suspension related all at once in an effort to head off any potential problems before winter hits. Also I knew some of these things needed attention, but there’s always more than you think. In the past I’ve done some major repairs outside, laying on the ground in well below freezing temperatures, but I would rather avoid that if I can.

To start things off, here is what’s being done. Out front it’s getting new struts, mounts, tie rod ends, ball joints, control arm bushings, braided lines, ABS deleted, rotors, pads, and new transmission to radiator cooler lines. In the rear it’s getting braided flex lines, wheel cylinders and some new hard lines. Not one to leave things alone, I ditched the non-functioning ABS to shed a few pounds and clean up the engine bay, upgraded to some Centric cryo-treated rotors, added Goodridge braided brake lines, put in some Hawk HPS pads, and did some Energy Suspension poly bushings in the control arms. I am pretty interested to see what all these items amount to in stopping power. More on that when it’s all done.

Next up, here are some things that might be useful for anyone else about to take on any of these tasks.
1. If you’re interested in what’s involved in deleting the ABS, read this.
2. If you are considering some Goodridge lines for your J body, there is one important thing to note – the rear lines are not bubble flare. At least the ones that came in my kit weren’t. This means you will not be able to directly bolt these lines up to your factory brake lines in the back. You will need to reflare the lines.
3. If you ordered some parts from Rockauto like I did and wanted to replace your strut bolts, they are not listed for this car, but guess what – they carry them! Part number AK42.
4. If you are replacing the rear wheel/brake cylinders, you’ll find that it is kind of a puzzle to slide them out between the hub and backing plate. It can be done. You also may find the new ones impossible to fit in the same way. This can be rectified by grinding away some material between the two mounting holes (I just made a big radius using a cutoff wheel) and then the cylinder can be slid in and rotated into position with nothing in the way. If that’s not clear enough, leave a comment asking for an illustration and I can put one up.

What project is complete without all of the inevitable snags? On to some of the other problems I’ve had along the way not including the ones listed above. Most of the front suspension and brake work went without any problems. This only serves to lull one into a false sense of security that the job will go smoothly the rest of the way. Don’t be fooled. Moving to the back, I pulled the drums off to check out the pads. They were in ok shape so I figured I would leave them alone. Then, however, both of the bleeders sheared off in the cylinders. After trying to EZout (I’ve never had this work on anything) and drill, I realized it was a waste of time and it would be easier to replace them… or would it? All of the brake equipment now had to come off also, good shape or not. Only one out of four of the not-so-convenient external-torx-head bolts came out, while the other four stripped. Wonderful. So the other three all had to have the heads ground off to free the cylinders, which are a bit of a tight fit to remove anyway as mentioned above. Of course, the fun didn’t end there. Almost all of the brake line fittings had seen a few too many winters, and so many sheared off, broke the line with them, or had to be removed by vise grips. Which means new lines and fittings had to be purchased, flared, coupled, bent into position, and so on.

Anyhow, there is light at the end of the tunnel and the whole project is nearly complete. As of this writing, I still have the passenger side rear replacement brake lines to do, the trans lines, reassembling the rear brakes, filling and bleeding the brakes, an oil change, and an alignment to call it done.
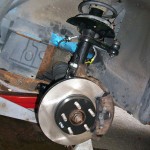
fancy stuff: cryo stops, hawk hps, stainless flex lines
fancy stuff: cryo stops, hawk hps, stainless flex lines

brakes & suspension in progress

brakes & suspension in progress
Posted in 1993 Pontiac Sunbird coupe | Leave a comment

The Mustang Grows Up.

With the .030″ overbore the Mustang has gained 4 whole cubic inches and gone from sub 5 liters to over 5 liters! 🙂

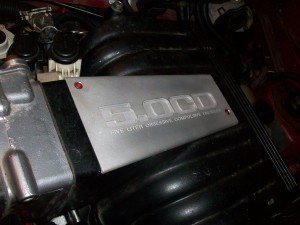
Ok, so finally here’s the big update. I’ll start with a picture of the upper intake plate I machined with the ever-popular 5.0CD logo! My EGR delete plate also has the logo, but it’s a little hard to see back there. It’s all back together and functional, and I’ll outline some of the dumb moves I pulled and other bumps in the road on the way to the triumph of it actually being done and running.

5.0CD upper intake plate

5.0CD upper intake plate

Where I last left off, the pilot bearing issue had just been taken care of. After that, I had a few things to reconnect like exhaust, o2, wiring, get the belt on, and all that little stuff. On to the next crisis. I filled it up with fluids for the first time and fired it up for the moment of truth … it sounded terrible! The lifters were extremely loud. So I shut it off after a few seconds. Hm. The rockers must need to be adjusted, I thought. Not really the most fun task since it involves removing the valvecovers (which is actually doable without taking off the upper intake because of my phenolic spacer, which is handy!) shimming the pedestals, and a lot of turning over the engine by hand. I ended up doing this and changing the thickness of a couple of the shims, but at the end of work one day out of the blue it hit me what really happened … somehow I remembered that I had never put in the oil pump driveshaft! That was a stupid move and it could have been disastrous if I didn’t catch it when I did. It had hardly run and there was plenty of assembly lube in there, so it should be fine, I figured.

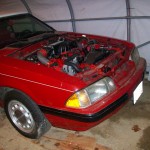
When I pulled the engine, I accidentally yanked the trans dipstick out of its hole when unbolting the trans, which dumped fluid everywhere so I had to top that off also. The brakes are a little soft from sitting and I think they might have to be re-bled at some point, but they work ok for now. I had run it a few times to move it around but hadn’t really gotten a chance to test it out, which I did yesterday. It still had the hood off, so decided to put that on today. I’m assuming that due to the old sagged mounts, it made just enough hood clearance for the engine – it’s always rubbed and hit in a few spots, I really need a cowl hood. In other words, the hood wouldn’t shut with all the new gear. As a temporary measure we put in some washers to space up the back of the hood just so it will close. It looks funny, but it works for now.

As for the test runs, it feels good. Really good. Partly because of the old tires out back and I’d like to think partly because of the bigger cam, it really winds up fast and it will spin the tires with almost no effort at all. I was a little surprised when I got on it a bit how little it took before traction was out the window. I also wondered if the hyper pistons maybe contribute to a slightly lighter rotating mass, but that’s just speculation. Anyhow, I couldn’t help but do another lap around the block today and distribute some of my rubber off the tires to the pavement where it belongs.  It made me feel better after my Sunbird woes of the day which will be chronicled in an upcoming post. The only things left for it now are to make it legal and get it registered, and then I’d like to get the AEM wideband installed so I can keep an eye on the air/fuel and keep the new motor out of trouble. Then I’d like to feed it some nitrous. Oh yeah, and the cage has to go in too.

The original 5.0 lasted a whole lot of drag passes, hard use, and a lot of fun miles, so here’s hoping the same from this one!

4 more cubic inches!

4 more cubic inches!

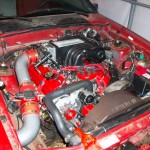
re-engined

re-engined

Posted in 1989 Ford Mustang convertible | 4 Comments