Shed.

There can be only Shed.

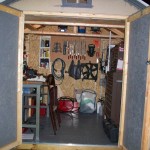
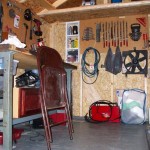
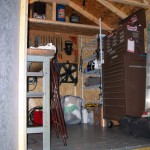
An exercise in maximizing space usage and making the most of a small area, Shed began life as an 8×8 kit. Its floors and walls were reinforced and some shelves were added in the rafters.  The core components that make Shed a successful workspace in which to carry out all my projects despite the limited space are the solid wood-topped bench and pegboard compliments of my employer, my toolbox, and a heavy duty wire shelf for parts storage. Organization is key or it will quickly fill with junk and become unusable. Some more Shed features of interest are its 12v lighting system which was created from a spare tail light bulb, some wire, and an old battery … and its modified electric space heater (where I took apart and threw away the fake fireplace part.)

Posted in Tech | Leave a comment

Gutility.

GUV: gutted utility vehicle©

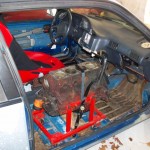
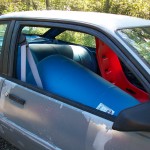
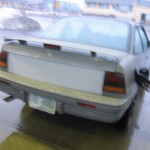
My Sunbird is part daily driven commuter, the occasional drag racer, and also part pickup truck! Below it’s loaded up with a set of 55 gallon plastic drums, and later a 2.0L shortblock which are just a few of the many things I have carried in the GUV. Others include many sets of wheels and tires, wheels and tires plus a complete F body front suspension, 8 foot 2x4s for a wall building project, lumber and building supplies for Shed, filled to the roof with boxes when moving, and piled high with garbage bags headed for the dump.

GUV 2.0L

C20LZ (2.0L OHC TBI) shortblock project riding shotgun.

GUV

Transporting a pair of 55 gallon drums.

Posted in 1993 Pontiac Sunbird coupe | 2 Comments

Solid motor and trans mounts.

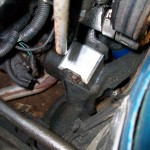
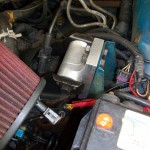
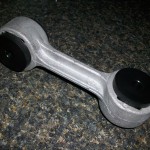
In yet another move that makes very little sense for a daily driven street car, I decided to go ahead and replace my completely shot factory motor mounts with solid ones. Every mount was beyond destroyed; they had all dropped down and were bottomed out on their housings with the formerly supporting rubber hanging useless. This made for random large vibrations and also lost power since the engine and transmission assembly could pretty much move around freely. I figured the car was already rather loud with no interior so how much worse could the solid mounts make it? Quite a bit, it turns out. The large vibrations were replaced with consistent smoother vibrations, and more rattling of the few items remaining in the cabin. It’s not really all that bad, but in combination with the loud exhaust and no interior, it does get a little tiresome on long drives … which is every day. It did feel a lot better and much more solid though, so I decided to stick with them. My quick cheap solution for now is to just toss in some earplugs for the long drives :). I also appropriately painted “NVH” on my back window since it’s kinda become the theme of the car. Of course, there is no aftermarket for the 2.0L bird, so I designed and machined my own solid motor and transmission mounts out of aluminum and in addition modified and made some delrin bushings for the torque strut “dog bone.”

I installed the mounts one at a time, starting with the transmission mount, then did the rear motor mount, and then put in the front motor mount (this I actually have not made a solid mount for yet, I used a reinforced/filled stock mount.) Anyway, something interesting happened when I put in the trans and rear motor mounts: when I looked at the front mount, I could see that it had raised back into the position it should have been before it collapsed. I figured that meant I did something right in making the other two solid mounts.

rear solid motor mount

rear solid motor mount

solid trans mount

solid trans mount

delrin bushed dogbone

delrin bushed dogbone

Posted in 1993 Pontiac Sunbird coupe | 2 Comments

Tensioner breakdown.

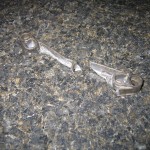
The latest bit of automotive excitement that’s happened lately was the complete failure of my timing belt tensioner. When my first one froze up and was no longer tensioning, it caused the belt to shred teeth off from vibration. So I threw on a working tensioner that had 230k miles on it and carried on. Cruising along at 75mph, I heard a big bang, and found myself dead on the side of the highway. I figured it was the belt again and it took me a minute to notice that the tensioner was totally gone except for two small metal tabs still bolted to the block. I grabbed the tools and started tearing off parts while I called for reinforcements to be delivered from my stockpile of Sunbird parts from home. Once all back together, I realized I didn’t have my timing pointer installed, so I had to do some guesswork to find the right spot and get it to fire up. Anyway, it finally did and I pushed on and made it to work only 2 hours late.

tensioner shrapnel

tensioner shrapnel

Posted in 1993 Pontiac Sunbird coupe | 1 Comment

Post-winter woes.

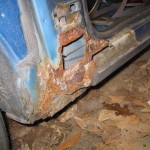
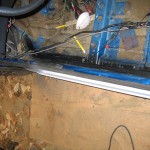
Adding another winter of not washing and daily driving my bird (on top of probably every other winter it has ever seen) has resulted in, you guessed it, rust and rot holes! Vacuuming out some dirt from my floorpan a few weeks ago, I noticed a rusty area in front of the rocker panel by the front edge of the driver’s door. Some gentle tapping revealed a small hole … a little more tapping led to a large hole … and so on until arriving at the ugly mess as seen in the picture below. I let it go for a week or so and then figured I may as well take care of the problem.

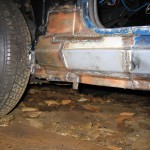
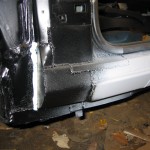
After removing the front fender and then door, then cutting off the front section of the rocker panel to survey the rest of the damage, I noticed something a little strange: the vertical supports inside the panels were really rotted, but the panels themselves were not in too bad of shape, save the missing portions I had already knocked out. I’m not sure if they used different material for those parts or what, but they were long gone. That’s when I decided to make some “subframe connectors” to stiffen it up in case the rotted supports were actually doing anything. The connectors are basically just 1×1.5x.080 wall steel tubing welded inside the car to the rocker panels (I will do the passenger side later.)  I think this should add a fair amount of support, and should be protected from future damage being inside the car; if the outer panels get bad, it should hold things together until they can be patched up again.

Pretty much all I do for repairs like this, especially if they are mostly not seen, is hack out the rotten sections back to good sheetmetal, then use some cardboard templates to get an idea of the shape I want, then MIG weld in the new panels, piece by piece. It’s  not necessarily the prettiest, but it gets the job done and I’m only going for function. Lots of times, I don’t even try to follow whatever used to be there, I will just pick a shape and go with it that isn’t too difficult to fab using just a vice and a hammer. I didn’t even bother to grind down the visible weld on the rocker panel … I just think of it as a scar. Anyway, I spread this out over about a week and borrowed the 4 door bird to get to work. Here are some before, during, and after pictures of the patch up.

Posted in 1993 Pontiac Sunbird coupe | 1 Comment

GN build update March edition.

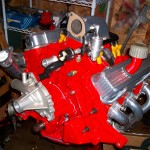
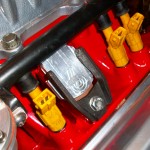
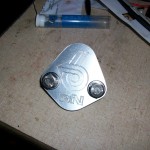
Slow progress, but progress none the less! Recently, I’ve measured and purchased a bunch of stainless hardware to replace most of the old upper engine hardware, and today I pressed in the new throttle body seals using a 4 inch long 5/16-18 bolt and reassembled the throttle body. The three big things I can think of that need to be done to get the engine finished are checking and setting the rockers, grinding some powdercoat out of the timing cover so the cam sensor will fit, and also powdercoating of quite a few more items, starting with the waterpump so it can be reassembled and installed once the timing cover is done. I’ve also designed and machined a couple items shown below: fuel pump blockoff and EGR deletes with turbo 6 logos.

Posted in 1986 Buick Grand National | 1 Comment

Unobtrusive Audio v2.0

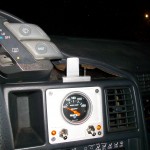
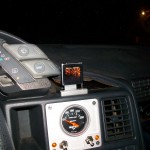
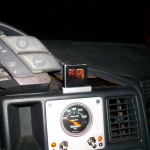
My original post “Lightweight, unobtrusive audio.” details my first ipod-only audio setup. This one has been a long time coming, because version two has been in effect for quite a while now. When pod one died I went soundless for a few months, until my favorite brother in law gave me his 6th gen nano which he said he didn’t use. Perfect, I thought, it’s smaller, lighter, and easier to try to mount somewhere than the old one. So I set about figuring how and where to mount it and here are the results! Like I’ve mentioned, I have an hour commute, and I did this setup when I started the longer commute, and it works great. Here are the pros and cons of the old setup vs. the new.

v1.0 (30gb ipod color)
pro: ran rockbox, so very customizable, i.e. large easy-to-see-quickly-while-driving text; space for tons of music
con: no good place to mount it so it just bounced around in my console; rockbox was a little glitchy at times

v2.0 (6gb ipod nano)
pro: securely mounted in easy-to-see location with nifty self-designed aluminum mount; super lightweight
con: can only start, stop, and volume control with gloves on; text pretty small and nothing is very customizable, but the text issue isn’t much of one since it’s mounted in an easy to see place; less drive space, but it’s an ok trade off for its size

Posted in 1993 Pontiac Sunbird coupe | 4 Comments

More deletions.

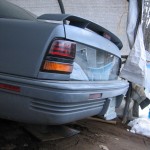
The latest items added to the Sunbird parts scrap heap in the name of simplicity and weight savings are the trunk mounted tail lenses and plastic trim panel. The lenses do contain the backup lights, but other than that are pretty much pieces of decorative plastic. I had wondered for a while what it may look like without them, but I wasn’t sure if I would like it or not. After some back and forth, I decided to go for it since it would be reversible anyway. I wanted it to be quick and easy, so the first version of the delete is some sheet steel cut to size, riveted to the trunk, and primered. With the steel I am estimating about 5lbs was removed. After giving it some time I’ve decided I really like the look of it, so I think I will keep it this way. All I need to do is get some backup lights in and it will be all set. There’s a good place to mount them in the tail lights, I just need to see what I can find for lights or LEDs to fit there. The second version now that I know I like it will be a lighter plastic panel to replace the steel one and I’d like to try out some countersunk rivets for a flush look.

Special thanks to my friend for deviating from accomplishing something productive to help me out with this project.

(new) polycarb rear panel

(new) polycarb rear panel

tail delete (mk.1)

tail delete (mk.1)

Posted in 1993 Pontiac Sunbird coupe | 2 Comments

Please paint that thing.

I got this stuck to my windshield yesterday … nobody else’s car in the lot got one. I think I’m insulted.

edit: by comment request, I’ve added a picture showing some of my paint. Apparently the reason it looks like this is because you aren’t supposed to put clearcoat directly over primer, so I have been told.

winter special

winter special

view of my paint

view of my paint

Posted in 1993 Pontiac Sunbird coupe | 4 Comments

Visions of the Moment.

Here are my current visions for the four cars currently in the 5.OCD garage. These tend to change, but here’s what’s in my mind at this particular moment in time…

Mustang
This one probably I see as one of the shorter paths to “completion,” if there is such a thing. Since it has recently gotten a new motor, that’s one big thing out of the way with this car. I’d like to get the cage installed, then get the few remaining parts I need to get a nitrous kit in it and wind up running a 100 to 125 shot through it. It needs a new hood to clear the intake (carbon fiber would be cool) and then I’d like to put on the clean trunk lid (luggage rack = ugly) that’s been in a box for years. 4.10s and maybe an axle & differential upgrade would be nice to keep the rear alive and add a little extra over the 3.73s that are in it. I also would really like some skinnies up front. I may consider a Megasquirt for it again, though the factory computer doesn’t do a bad job, so I’m not sure if it’s worth it… That’s really about it. Not too much relatively.

Sunbird 2 door
There’s a whole lot I’d like to do to my daily driven bird. My current plan is basically a new top end, sticking with the SOHC 8 valve head. I’d like to get a spare head, have it ported, and match up the extra stock intake to the head, add the throttle body I bored, the new cam, valvesprings, and forged followers, and have it all ready to bolt on. The Megasquirt and harness is ready for action, so that will be a must for tuning all the new hardware. The thing I worry about a bit is the trans. It functions fine now, but the shifts are pretty soft (always were) and I’m not sure it will hold up forever with more power, particularly when adding the nitrous. So a built up trans would be nice, but it wouldn’t come cheap. Since I’m dreaming, some forged flat top pistons for upped compression and fortifying the bottom end with some better hardware etc. would compliment the trans, and then it could easily handle a 75 shot or more and the redline could be moved up to the 7000+ range. I think that’s where I’d ultimately like to end up; adding some naturally aspirated horsepower and retaining most factory parts while keeping it tame enough for easy winter driving, and also maintaining reliability with a bottom end and trans that can handle the occasional nitrous beating.

Grand National*
Just finishing it would be nice. There’s quite a bit done, but also quite a ways to go. In a nutshell, I’d like to see 400hp out of the new engine. The vision is kinda hard to see from this far in the distance, so it’s still a little hazy. I think the bottom line is to get the engine put together, get it put back in and running, get everything hooked back up, exhaust, hoses, all the little stuff that’s missing and then see where I’m at. I am seeing it as becoming a comfortable, spacious fair-weather cruiser that will see a decent amount of street miles and maybe some sort of dual tune setup where it will run mild boost on the street and be able to turn it up for some dragway mayhem. Another twist in the plot is this isn’t going to be your typical stored-in-a-climate-controlled-garage, low-mile, super-shiny-perfect-paint GN like a lot of them out there are. Think more of a survival rat with dents, dings, and touch ups; putting the money that would have gone into (aka wasted on) looks into something that makes it function better or go faster.

Sunbird 4 door*
Most people I’m sure would not consider it one, but this is kind of our luxury car of the bunch. It has a full interior, comfortable seats, space to carry groceries and stuff, and isn’t super loud (although does have a nice sounding Borla.) I’d like to keep with that theme with a focus on handling and of course add some power, probably with more of a focus on torque. The long-standing idea has been an Eaton M62, but it would be somewhat complicated to set up due to the need for a custom intake to mount it on, which in turn would require some involved design and fabrication. It would be unique and interesting, and I have gotten a start on designing the intake, but it is quite a ways from reality. A previous hurdle was the engine management, but now that I know how to set up the Megasquirt for a bird it shouldn’t be an issue; however, I may lean towards an MS2 for more refinements like idle control for this car.

* These cars belong to my wife, so my vision is subject to her input. 🙂

Posted in Projects | 2 Comments