Research and Development Mishap.

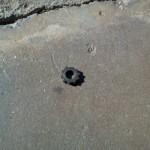
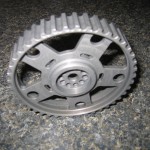
Several years ago I machined an adjustable cam gear for the 2.0. It was a single piece of aluminum and adjusted by having offset holes for the cam dowel in the center to alter the cam timing. To make a long story short, you will notice that there is very little material left in the center. I intended to make a support washer for this to make it more solid, but … I never quite got around to it. I had actually been running the gear for quite a while, and you can probably imagine what happened from there. While exiting the highway on the way to work: Clang! clang! clang! as it went bouncing down the road. After a quick tow to work, I saw what was left. I replaced the factory steel gear a few days later and headed home. I actually have three (new 2 piece design, and stronger of course) adjustable cam gears already in progress, so once I get one finished up I’ll see if it fares better!

pre-shear gear

pre-shear gear

remains of gear

remains of gear

Posted in 1993 Pontiac Sunbird coupe | 1 Comment

Cracked head …

Mini update about the red car … it turns out it was both a blown head gasket AND a cracked head, happy day! I didn’t look at the head too close in the middle of putting on the new gasket in the below-freezing temps because I haven’t had a bad one before, and I was hoping I could expedite things and not be as thorough as I should, and … well it didn’t pay off this time.

After it started acting up again and I ran a leakdown test, it shot coolant out the thermostat housing showing that number three was in bad shape. Luckily I found a place that offers remanufactured heads at a reasonable price that didn’t require a core in return to get things underway quicker. Once the old head was off, I could see cracks between the valves in all four combustion chambers. (Pics to follow.)

So after the new head all is finally well, which is good because now I need to replace the leaking rusted out fuel lines on the 2 door… it’s always something.

Posted in 1993 Pontiac Sunbird sedan | Leave a comment

Hood pins.

My second set of Quik Latch mini “hood pins” began to fail: on the way home one day, half of the hood started floating up on the highway which was a little scary.  It was time to do something about it. Although that’s exactly what I said after the first ones failed, it was easier to put on a second set just to get by for a while.  The problem is the Quik Latch pins only have three very small tangent contact points, so they wear easily and once they do, they don’t hold on any more. To be fair, I don’t think they are designed to be hood pins (the company makes much larger ones for that.) Still, it seems like they are supposed to hold on body panels and other similar things, which would undergo some of the same stresses, so I’m not sure I would trust them for anything more than very light duty.

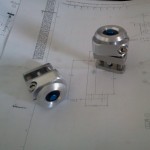
I made a temporary hood pin that was basically a threaded rod to replace the Quik Latch ball stud and then turned up a stepped washer on the lathe to bolt the hood closed. Then I set to work on designing my own hood pins. I wanted them to function similar to the Quik Latches and not need any tools to open the hood, be quick and easy to operate, be small and unobtrusive, have a flush look unlike regular hood pins, use the same holes that were already in the hood, and most importantly be solid! Which of course is asking a lot. That being said, I think I succeeded and really like the look of the new ones with the black anodized aluminum top piece. The new pins work with ball lock pins that latch into stainless receivers mounted to the radiator support.  They were a bit of a challenge to install due to getting the compound angles to line up, but once that was taken care of they worked fine. They seem very rugged, so we’ll see how they hold up in the long term.

pin assemblies pre-anodize

pin assemblies pre-anodize


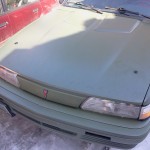
anodized and installed

anodized and installed


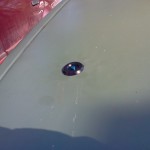
anodized close up

anodized close up


Posted in 1993 Pontiac Sunbird coupe | 4 Comments

Yet another head gasket.

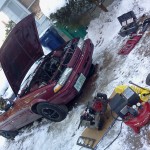
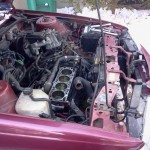
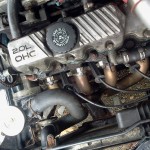
No surprise here: yet another 100,000 mile head gasket failure! Well, it was a little early this time at around 90k. It was stumbling pretty bad on startup with some white smoke and was continually getting worse. It was a relatively minor one, not an all-out explosion like some have been, but still needed to be taken care of.

The worst part was trying to get it done outside in the driveway between New England snowstorms. I spread it out over the course of a month, usually just working on it for one day out of the weekend. So in the end it only took maybe 4 days (not full ones either) and went pretty well. I bundled up, warmed my hands on a halogen light and it wasn’t too terrible. All good now…

scene in the driveway

scene in the driveway

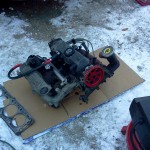
head, intake, exhaust manifold removed as assembly

head, intake, exhaust manifold removed as assembly

ready for the new gasket

ready for the new gasket


Posted in 1993 Pontiac Sunbird sedan | Leave a comment

Exhausted 2.0

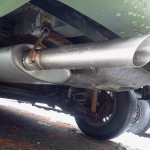
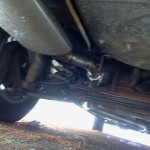
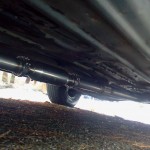
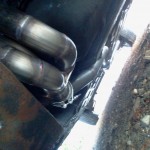
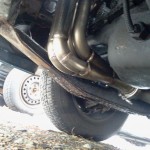
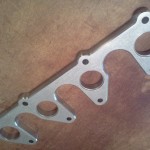
Not only referring to myself at the end of the day, but the latest upgrade to the two door Sunbird: a custom, fully stainless exhaust system… I mentioned this was in the works in a previous post somewhere, but it’s finally finished. It was somewhat expensive, but it came out looking, sounding, and feeling awesome, and I’m really happy with it and the shop that did the work and find it was well worth the expense. Plus, it won’t be rusting out every couple years like the cheap replacement exhaust parts, which also don’t fit so well and I’m sure flow horribly. So here’s the details, and then I’ll let the pictures speak for themselves: .5″ stainless exhaust flange machined by myself (nobody makes them of course,) 1.5″ primary (approx 24″) long tubes  merging under the oil pan to a 2.25″ collector with bung for narrow o2, vband to intermediate pipe with flex pipe and bung for wideband o2, vband, resonator, vband, cat back, vband right after the rear axle to a Borla ProXS and a straight slash cut tip. Everything is stainless, mandrel bent, and straight through. It has a mellower and slightly quieter tone (mostly noticed from the outside, since the inside is always loud,) that sounds really nice, and has picked up some power too – I surprised myself by punching it when leaving a friends house the other day and it actually broke the tires loose – it didn’t used to be very easy to do that. I had to extend my narrow o2 wire and reroute the wideband harness since everything moved, but that’s it. On to the pictures.

Posted in 1993 Pontiac Sunbird coupe | Leave a comment

Wagon work 1.

It’s still in progress, but here’s kind of a halfway update on the work on the wagon. I sanded a bunch of bubbled rust areas all over, sprayed them with some rust converter, and then primered them so far. This is a temporary fix for now mostly so it isn’t as ugly and to slow down any rusting. I may have to wait for some warmer weather to really get it all fixed up. As I mentioned, most areas are still pretty solid, with some exceptions on the rocker panels, so I ordered entire new panels and am waiting for them, which may be a while. One of the brake pads is banging around, so I have to fix that and I think one of the struts is weak also. I happen to have some spring/strut/mount assemblies laying around from the original 91 Sunbird that have the earlier mounting bolt pattern that I’m going to put in. I also tossed the ugly roof rack and pulled all the trim off to be able to get at rusty areas, and I’ll probably leave it all off because I like it that way. I also removed the timing belt cover because I like the look of the cam gear being exposed and it makes it easier to see the status of the belt, and also makes it easier to change it. However, it wasn’t really necessary on the 1.8 because of the different cover design which is really easy to get off. Here are a few updated pics of the car looking a bit less rusty and ugly.

rackless, trimless, primered

rackless, trimless, primered

and another view

and another view

Posted in 1986 Buick Skyhawk wagon | Leave a comment

Welcome, wagon.

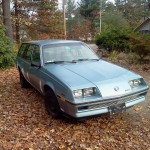
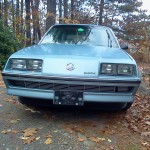
I’ve been wanting a wagon for quite a while, and even though it’s not the ideal time for me to pick up another [old/project] vehicle, I threw caution to the wind as usual and got one anyway! Introducing the 1986 Buick Skyhawk wagon! I really wanted something that was ready to go and needed little to no work initially. Apparently all that went out the window, but let me try to justify myself anyway. I saw the car posted for sale online and decided that despite the 1.5 hour trip, I’d check it out. The second I saw rust patches all over the doors, I knew the price was way high. Had I not just driven an hour and a half to see it, I probably would have written it off at first sight and went home, but then I figured I’d look it over since I was there. Underside: actually really clean, engine: pretty clean and runs great, strut towers: no rust to be found, behind back bumper: solid, rust spots on door: crusty, but actually still solid, wheel wells: rust free, lights: functional, heat: functional, well ok you get the picture. Everything actually worked, and it was more solid that it looked at first. The worst parts are some ugly spots on the doors, passenger rear door is a bit caved in on the bottom, and the rockers need some patching (but are actually in better shape than the two door’s which I fixed up not long ago.) So I stood around and thought about it for a while … to my detriment I was standing in front of it and I think what really happened is the four eye front end started to wear me down … it’s just hard to say no to a good looking four eye. I decided that if he’d take half of what he was asking I wouldn’t mind busting out the welder and getting it back into at least inspectable shape for now, then maybe a little more cosmetic work when it warms up; or maybe I’ll even get ambitious and do it sooner, who knows. Needless to say, he did and here we are.

The other thing I like about it of course is that it’s (yet another) J body, so the parts interchangeability factor will make it a lot more economical to keep up. The SOHC 1.8L is the predecessor to the 2.0L, so it’s extremely similar. In other countries they refer to them both as the big block, which I always find funny. The 2.0 is just a bored and stroked version of the 1.8, and you could actually bore the 1.8 block to 86mm like the 2.0 and convert it if you really wanted to. Anyway, the idea is for it to be a comfortable family and whatever-else hauler and probably mostly a backup vehicle if one of the other two birds need some work or whatever. I’m planning on spending the day tomorrow conquering some rust and doing some welding on it, and I’m already loving the room of the wagon, as I have the hatch filled up with 4 toolboxes, a big box full of parts and junk, and a fresh welding tank with room to spare.

skyhawk front

I really love the front end. A lot.

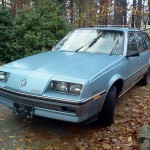
skyhawk ok side

This is the more-ok looking side at the moment.

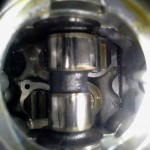
1.8 cam

The 1.8 cam cover isn't baffled below the filler like it is on the 2.0s which is actually kinda nice. It shows that it's nice and clean in there and the cam is in good shape!

Posted in 1986 Buick Skyhawk wagon | Leave a comment

Side marker upgrade.

So today’s mini Sunbird resto project was to put some new front side marker lamp assemblies in. The originals were all cracked, beat up, and coming apart at the seams. The stamped-sheet-metal-self-threading-nuts that attach them (via plastic studs) are a huge pain to work with because they rust, are rounded and hard to get a tool on, and also a little difficult to get at;  so I decided to go a different route. I used a 1/4-20 die to thread the studs on the new parts, and then used washers and wing nuts to attach them. The front one has to be put on either first or before everything gets tightened because it’s hard to access, but knowing that, it works sweet.

Now for one they look better, and for two pop on and off easy with no tools. I used some standard steel hardware because it was available, but plan to replace it with nylon wing nuts and washers – they won’t rust and should hold them on just fine. I took a picture of the threaded studs, but it came out terrible so I’m not going to bother…

Posted in 1993 Pontiac Sunbird coupe | Leave a comment

Bird update 9/14

Since it’s been a long time, I’m going to roll all my Sunbird goings-on into one big update. It has of course been daily driven and not had any major problems other than yet some more rust repair and has just been reliably racking up the miles and carrying on. I’m also continuing to develop parts for the 2.0L and cementing my plans for the future, since this is likely soon to be my only car for a while. So I’d like to make it a little more fun, to improve its performance and handling, and also make it a little quieter.

On to what’s been going on…

Stage 1 performance upgrade attempt 1:
The plan was to grab a UAFC from 14point7 to do some quick and dirty tuning, put in new followers and a factory 20SEH cam, magically add 15-20hp and wind up with somewhere around 125-130hp quick, cheap, and easy! Of course reality struck soon after and the UAFC wouldn’t read the RPM and suddenly the project was dead in the water. To their credit, they were very helpful in trying to get it working, but in the end it wasn’t happening. I was not about to toss a wildly different cam into my daily driver and see what happened, so back to square one. One of the reasons I wanted to try this route is the ease of setup. I still plan to go to the Megasquirt, and now it seems to really be the only option anyway, but I need downtime to get it all set up which can be tricky on a daily. So one step at a time I’ll see if I can get the MS ready to go and then maybe I’ll need some experienced help to iron out the tuning quickly. Then toss in the new cam and see how it does. It will just take a while I’m sure, which is what I was hoping would not be the case.

In preparation for the piggyback tuner, I swapped from a DIY wideband kit which seemed to work ok, but was pretty jumpy to an AEM wideband controller & gauge mostly because it is simpler and would help with datalogging. It was an easy switch and the gauge looks and works very nice.

Painting project:
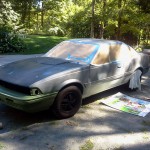
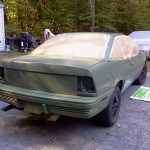
I was going to call this the beautification project, but that was kind of laughable. My friend convinced me that a rattle can paint job was the way to go, especially for how I use the car, and I think he was right. Scrapes, repairs, changes, just grab the extra can off the shelf and touch it right up … no messing around. On a whim, I changed my mind about the color – previously I’d wanted to keep it gray and really like the “cement gray” color found on some newer Scions. I still may have to use that on something down the road. Anyway, the new color of choice is Krylon italian olive satin. Love it or hate it, that’s what it is. I spent all weekend grinding some rusty spots, and acetoning off the old flaky clearcoat, and then masking and painting of course. A few things I learned along the way are:

  1. It is extremely difficult to get the paint to look even when using cans (a real spray gun is much easier in this respect actually.)
  2. Those paint-can-trigger things are very well worth it
  3. The roof is easily the hardest part to do and to get even (mine isn’t even, but it’s done.)
  4. It takes about a dozen cans (I used 10 actually, but better to be safe, and I had a nicely primed base.)
  5. To get it to look even kinda smooth and even takes some serious practice, if it’s possible at all … the best I can advise from my limited experience is to try broad, quick strokes, and do sections while keeping them “wet”
  6. Start with the roof (this tip was passed down to me.)
  7. There’s a fine line between sparse paint, enough paint, and a run.


Below are some pics. It’s certainly not the prettiest thing on the road, but it does look a lot better than flaking clearcoat, and I like how it turned out. I ran out of time for the additional masking needed to do the hood black so I just shot it in green, but it will be getting painted black. Also, I left the spoiler off for the same reason and moved the third brake light inside the car. I kinda like the wingless look, but nobody else I ask seems to, so I’m not sure on that one yet. I’m going to keep the brake light inside because the old metal housing was heavy and all the bolts were seized in it.

Stage 2 upgrade/the future:
The next big thing scheduled is getting a full stainless 2.25″ mandrel bent exhaust fabbed up with v bands at the resonator and muffler, which will be a Borla ProXS. Same one that’s on the four door and has a really nice sound without being super loud. The shop where I intend on getting it done is pretty busy, so it might be a month or so before it happens, then will try and get some pics up of it.

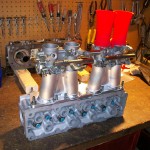
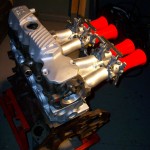
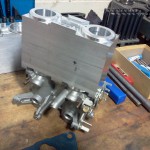
Another project that has been under wraps for quite a while is a custom individual throttle body intake setup that I’d like to use with the Megasquirt, a ported head, stainless header, Newman cam, and rebuilt engine. This is the Stage 2 plan. It took a ton of time to model and machine the intake, but it is basically finished now. Internally, the runners taper from the size of the tb outlets to the intake runner port size, while bending between the spacing of the tbs and the runners. The throttle bodies are from a GSXR600. I still need to do some work to attach the throttle shafts back together, the fuel rail, updated clamps to hold the bodies to the intake, and some other minor stuff. I also designed some intake trumpets and retainers and had them 3d printed. I’m not sure if I’m going to use them yet – mostly because there are no provisions for filters, but it was a fun process regardless. The throttle bodies originally have 2 injector ports per runner and secondary butterflies, so I had to make some plugs for the extra holes after removing everything. Also, had the injectors tested and kept the 24# set, which should be perfect. I began some port work to the head by opening up the intake runners at the valve seats, but have stalled on head work for now because of time. Here are a few mockup pictures of the intake in progress, and that’s it for now.

trumpets on itb on intake on head

trumpets on itb on intake on head

intake mockup

intake mockup

from block of aluminum to pair of runners

from block of aluminum to pair of runners

Posted in 1993 Pontiac Sunbird coupe | 2 Comments

Mustang for sale.

Unfortunately, due to many factors including lack of time, funding, housing issues, lack of use, storage, the fact that it is not a practical daily driver, and so on … the Mustang is now up for sale. This is the car that got me into cars, and the first car I ever bought, so it’s hard to let it go, but I have had lots of fun and learned a lot with it over the years. If interested … leave a comment!

Posted in 1989 Ford Mustang convertible | 2 Comments