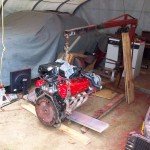
The old engine came out without much trouble, and my mission was to reuse everything I could and keep money and time spent to a minimum. That doesn’t usually go quite as planned, and this was no exception. I hear the P heads come with some pretty mediocre valve springs, and although I never had any issues, I didn’t really want to chance it now that I was putting in a higher lift Trick Flow cam (this is about the one thing that I splurged on that wasn’t totally necessary.) As luck would have it, I already had a Trick Flow spring kit that was installed on my original E7 heads and had seen very little use. Once the heads were off, a quick inspection showed that some of the valves had a decent amount of carbon buildup and I couldn’t just let that slide. So minus one on the time spent category as I removed and cleaned each valve while swapping valve springs from one head to another (which is kind of a pain with my cheap valvespring compressor) and installing new seals along the way. The guides seemed to be in decent shape, so that helped in the cost department. After that, it was just installing most of the old parts onto the block which didn’t present any real challenges. I had a partial ARP bolt kit, but had to get a few extra items from the hardware store to finish it off.
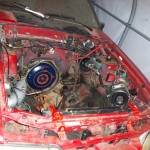
Here’s where it got interesting. I was looking pretty good on schedule to finish by the first week of September, when I finally hit the snags I’ve come to expect. I decided to upgrade to some Prothane motor mounts (originals were old and shot) and so had to remove the old ones of course. Passenger side, no problem – except for having to dig out the never-used 21mm socket for the oddball 14mm metric nut anyway. Driver side, frozen. Grab the breaker bar, start turning and then the dripping starts. I broke the nut free, but also broke the power steering line in the process. Naturally, none of the 3 auto parts stores (that were open) could get me the line for days, so another setback of time. Ok, I decided, let’s deal with that later and at least get the engine in. With some help, in it goes. When mating it to the trans, however, things were not falling into place. After some thought, I realized that I had forgotten this engine originally was equipped with a manual transmission. So, I’m sure you know where I’m going with this, but the pilot bearing was still in the crank preventing the torque converter from seating in as it should – I had not even thought to check before dropping in the motor. Back out it comes. Then the search for a pilot bearing puller began, which I was not able to get until the next day. So overnight it was dropped into the bay to sit until it could be again hoisted and the bearing could be removed and then dropped back in once again finally.
That is the update until the rest of the little things can be buttoned up, so maybe another week or two at most (busy schedule) and it will be back on the road. Enough to get a little use out of it during the fall, I hope, and then ready for some serious use next summer!
Update: some mid-swap photos.


I think we need an update… and a new photo!
I’m on it!
…just not very quickly! 🙂